Cheek fillers have rapidly become one of the most popular non-surgical cosmetic treatments. Whether to restore volume lost due to aging or to enhance facial contours, cheek fillers offer a minimally invasive solution with immediate results. If you’re considering getting fillers, it’s essential to understand what the procedure entails, how it’s performed, and what recovery looks like.
This comprehensive guide walks you through the filler procedure step by step, from consultation to recovery, so you know exactly what to expect.
Do you want to visit Haridwar? travel agents in Haridwar is the right place to plan your tour. You can book your tour from here.
What Are Cheek Fillers?
Cheek fillers are dermal fillers—typically composed of hyaluronic acid (HA)—injected into specific areas of the mid-face to add volume, define contours, and create a more youthful appearance. Popular brands include Juvederm Voluma, Restylane Lyft, and Radiesse. Some fillers stimulate collagen production, while others simply add volume.
These fillers are ideal for:
Do you want to visit char dham? char dham tour operator is the right place to plan you Char Dham tour. You can book you tour from here.
Enhancing cheekbones
Reducing the appearance of nasolabial folds (smile lines)
Do you want to visit Indiar? tour operator in India is the right place to plan your tour. You can book your tour from here.
Lifting sagging skin
Restoring facial balance
Step-by-Step Guide to the Cheek Filler Procedure
1. Consultation with a Licensed Professional
The first step is a one-on-one consultation with a licensed and experienced injector, such as a dermatologist, plastic surgeon, or certified aesthetic nurse practitioner.
During the consultation, you’ll discuss:
Your aesthetic goals
Medical history
Skin condition and facial structure
Suitable filler types
Your provider may also take photographs for reference and to compare results later.
2. Pre-Treatment Preparation
Once you’ve decided to proceed, you may be given pre-treatment instructions to minimize the risk of bruising or swelling. These often include:
Avoiding blood-thinning medications (e.g., aspirin, ibuprofen) for at least 5–7 days
Stopping supplements like fish oil, vitamin E, and ginkgo biloba
Limiting alcohol intake 24–48 hours before treatment
You’ll also be advised to arrive with a clean, makeup-free face on the day of the procedure.
3. Cleansing and Numbing
At the beginning of the procedure, your provider will clean your face thoroughly to reduce the risk of infection. A topical numbing cream may be applied to minimize discomfort during the injections. Some fillers also contain lidocaine, a local anesthetic, to make the process more comfortable.
4. Marking the Injection Points
Using a sterile pencil or skin-safe marker, your provider will identify the precise injection points on your cheeks. These marks help guide accurate filler placement to achieve balanced and natural-looking results.
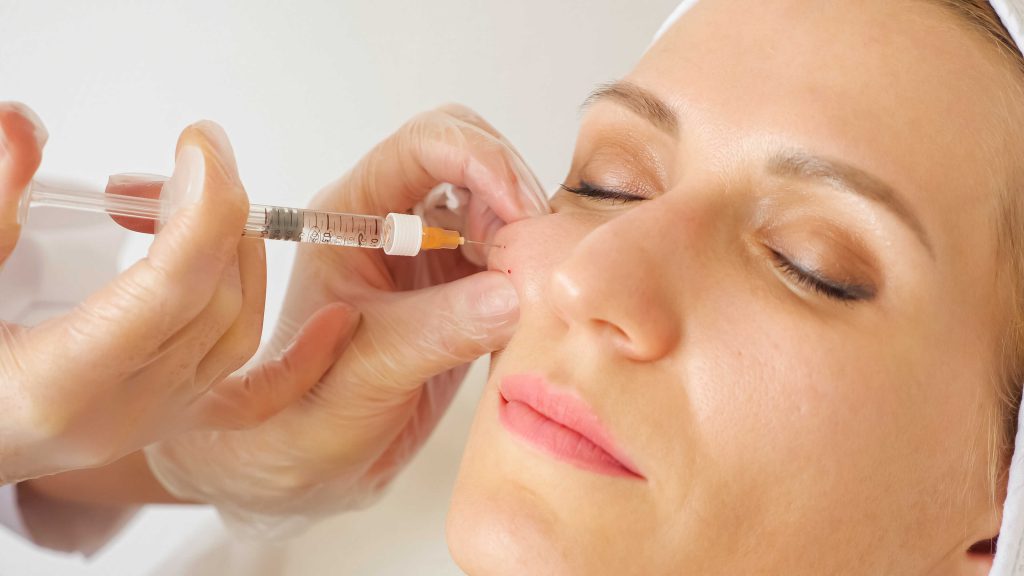
5. Injection of the Filler
Using a fine needle or a blunt-tipped cannula, the filler is injected into strategic areas of your mid-face. The depth and technique of injection may vary based on your facial anatomy and desired result.
The entire injection process typically takes 15 to 30 minutes, depending on how much filler is being used. You may feel slight pressure or a mild pinch, but it shouldn’t be painful.
6. Massage and Sculpting
Once the filler is injected, your provider will gently massage the area to evenly distribute the product and sculpt the cheeks into the desired shape. This step ensures a smooth and symmetrical result.
7. Post-Treatment Evaluation
After the injections are complete, your provider will assess the results and ensure everything looks balanced. You’ll be given a mirror to review the outcome and ask any final questions.
What to Expect After the Procedure
Immediate Results
One of the biggest advantages of fillers is that you’ll notice a difference immediately. Your cheeks will look fuller and more defined, though some initial swelling or redness is normal.
Common Side Effects
Mild swelling
Redness
Bruising
Tenderness
Slight asymmetry (temporary due to swelling)
These effects are generally mild and resolve within a few days to a week.
Recovery and Aftercare
1. Post-Treatment Care
Botox nottingham, to optimize results and minimize side effects, follow these aftercare tips:
Avoid touching your face for at least 6 hours.
Don’t apply makeup for the rest of the day.
Avoid intense exercise, saunas, or hot baths for 24–48 hours.
Sleep on your back with your head elevated for the first few nights.
Avoid alcohol and salty foods which can worsen swelling.
2. Managing Bruising and Swelling
Apply a cold compress gently for 10–15 minutes at a time during the first 24 hours.
Arnica gel or tablets may help reduce bruising.
Over-the-counter pain relievers like acetaminophen (Tylenol) can be used if needed.
3. Follow-Up Appointment
Your provider may schedule a follow-up visit 1–2 weeks post-treatment to assess results and determine if a touch-up is necessary. This is also a good time to address any concerns you may have.
How Long Do Cheek Fillers Last?
Cheek fillers typically last 12 to 18 months, depending on the type of filler used, your metabolism, and lifestyle factors. Some individuals may notice longer-lasting results with collagen-stimulating fillers like Radiesse or Sculptra.
Maintenance treatments can be scheduled to preserve your results over time.
Risks and Considerations
Though fillers are generally safe when administered by qualified professionals, they are not entirely risk-free. Potential complications include:
Lumps or unevenness
Allergic reactions
Infection
Vascular occlusion (rare but serious)
To minimize these risks, always choose a licensed and experienced provider who uses FDA-approved products.
Swelling and Bruising
- Frequency: Common
- What to Expect: Mild swelling and bruising at the injection site are the most common side effects. These typically resolve within a few days to a week.
- Prevention/Treatment: Avoid blood thinners and alcohol before treatment. Post-procedure, use ice packs and avoid strenuous activities.
2. Tenderness or Discomfort
- Frequency: Common
- What to Expect: Some tenderness or sensitivity in the treated areas can occur. This usually fades within a few days.
- Tip: Over-the-counter pain relievers like acetaminophen (Tylenol) can help alleviate mild discomfort. Avoid NSAIDs like ibuprofen, as they may increase bruising.
3. Lumps or Bumps
- Frequency: Occasional
- What to Expect: Uneven texture or small lumps can develop if the filler is not properly distributed or if your skin reacts. These are usually temporary.
- Solution: Gentle massage may help, or your provider might dissolve the filler using hyaluronidase (an enzyme that breaks down hyaluronic acid fillers).
4. Asymmetry
- Frequency: Occasional
- What to Expect: One side may appear fuller than the other right after treatment due to swelling or uneven filler placement.
- Solution: Often resolves naturally as swelling subsides. Minor touch-ups may be needed for perfect balance.
Final Thoughts
Cheek fillers are a powerful tool for facial rejuvenation and contouring, offering quick results with minimal downtime. Whether you’re looking to restore volume lost with age or enhance your natural cheekbones, this non-surgical procedure can provide stunning yet subtle results.
By understanding each step of the process—from consultation to recovery—you’ll be better prepared, more confident, and more likely to enjoy a smooth and satisfying experience.